Import and Export#
This section provides guidance on importing data into Mosaic and exporting results for further analysis.
Import#
Mosaic uses file extensions to determine the file type. Therefore, you need to make sure the file you are loading has an extension appropriate for its type, such as mrc for CCP4/MRC files.
Click File > Open (⌘ + O for macOS / Ctrl + O) to open the file selection dialog.
Navigate to your data file and select it. Mosaic supports various formats including:
MRC, MAP, EM, H5 (volume segmentation data)
OBJ, PLY, STL (mesh data)
TSV, STAR (point cloud data with angular orientation, e.g. protein picks)
XYZ, CSV, TXT, GRO (point cloud data)
Note
For more information on supported file formats, see the File Format Reference.
Configure import parameters in the dialog that appears:
Scale: Data coordinates are multiplied by this value (default: 1.0)
Offset: Shifts data position (default: 0.0)
Sampling Rate: Defines resolution/spacing (default: 1.0)
Note
The scale factor and sampling rate is automatically populated using file header information for volume segmentation data.
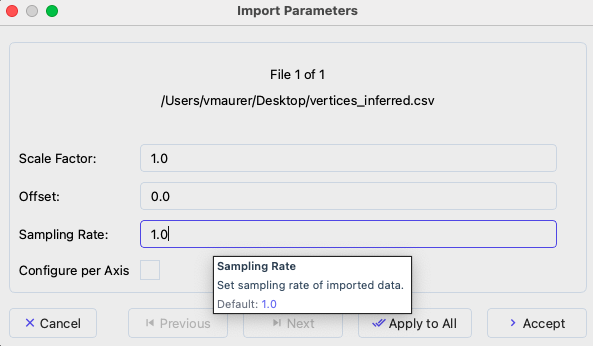
Data import dialog showing scale, offset, and sampling rate options.#
The import settings can be specified per file using the Previous and Next buttons for navigation. You can use the currently selected settings for all files by using Apply To All.
Click Accept to load the data. A progress bar will open to inform you on the import status.
Your data will appear in the 3D viewport and be listed in the Object Browser panel on the right. You can load recent files via File > Recent Files.
Visual Properties#
You can modify the visual properties of items in the Object Browser. To do so, right-click on one (or multiple) elements and click the Properties button to bring up the dialog window displayed below.
The properties tab is structured based on:
Appearance: Set color and rendering options of objects.
Lighting: Change the lighting of the scene.
Model: Replace points with volumetric models in corresponding orientation.
Sampling: Modify the sampling rate of the underlying objects.
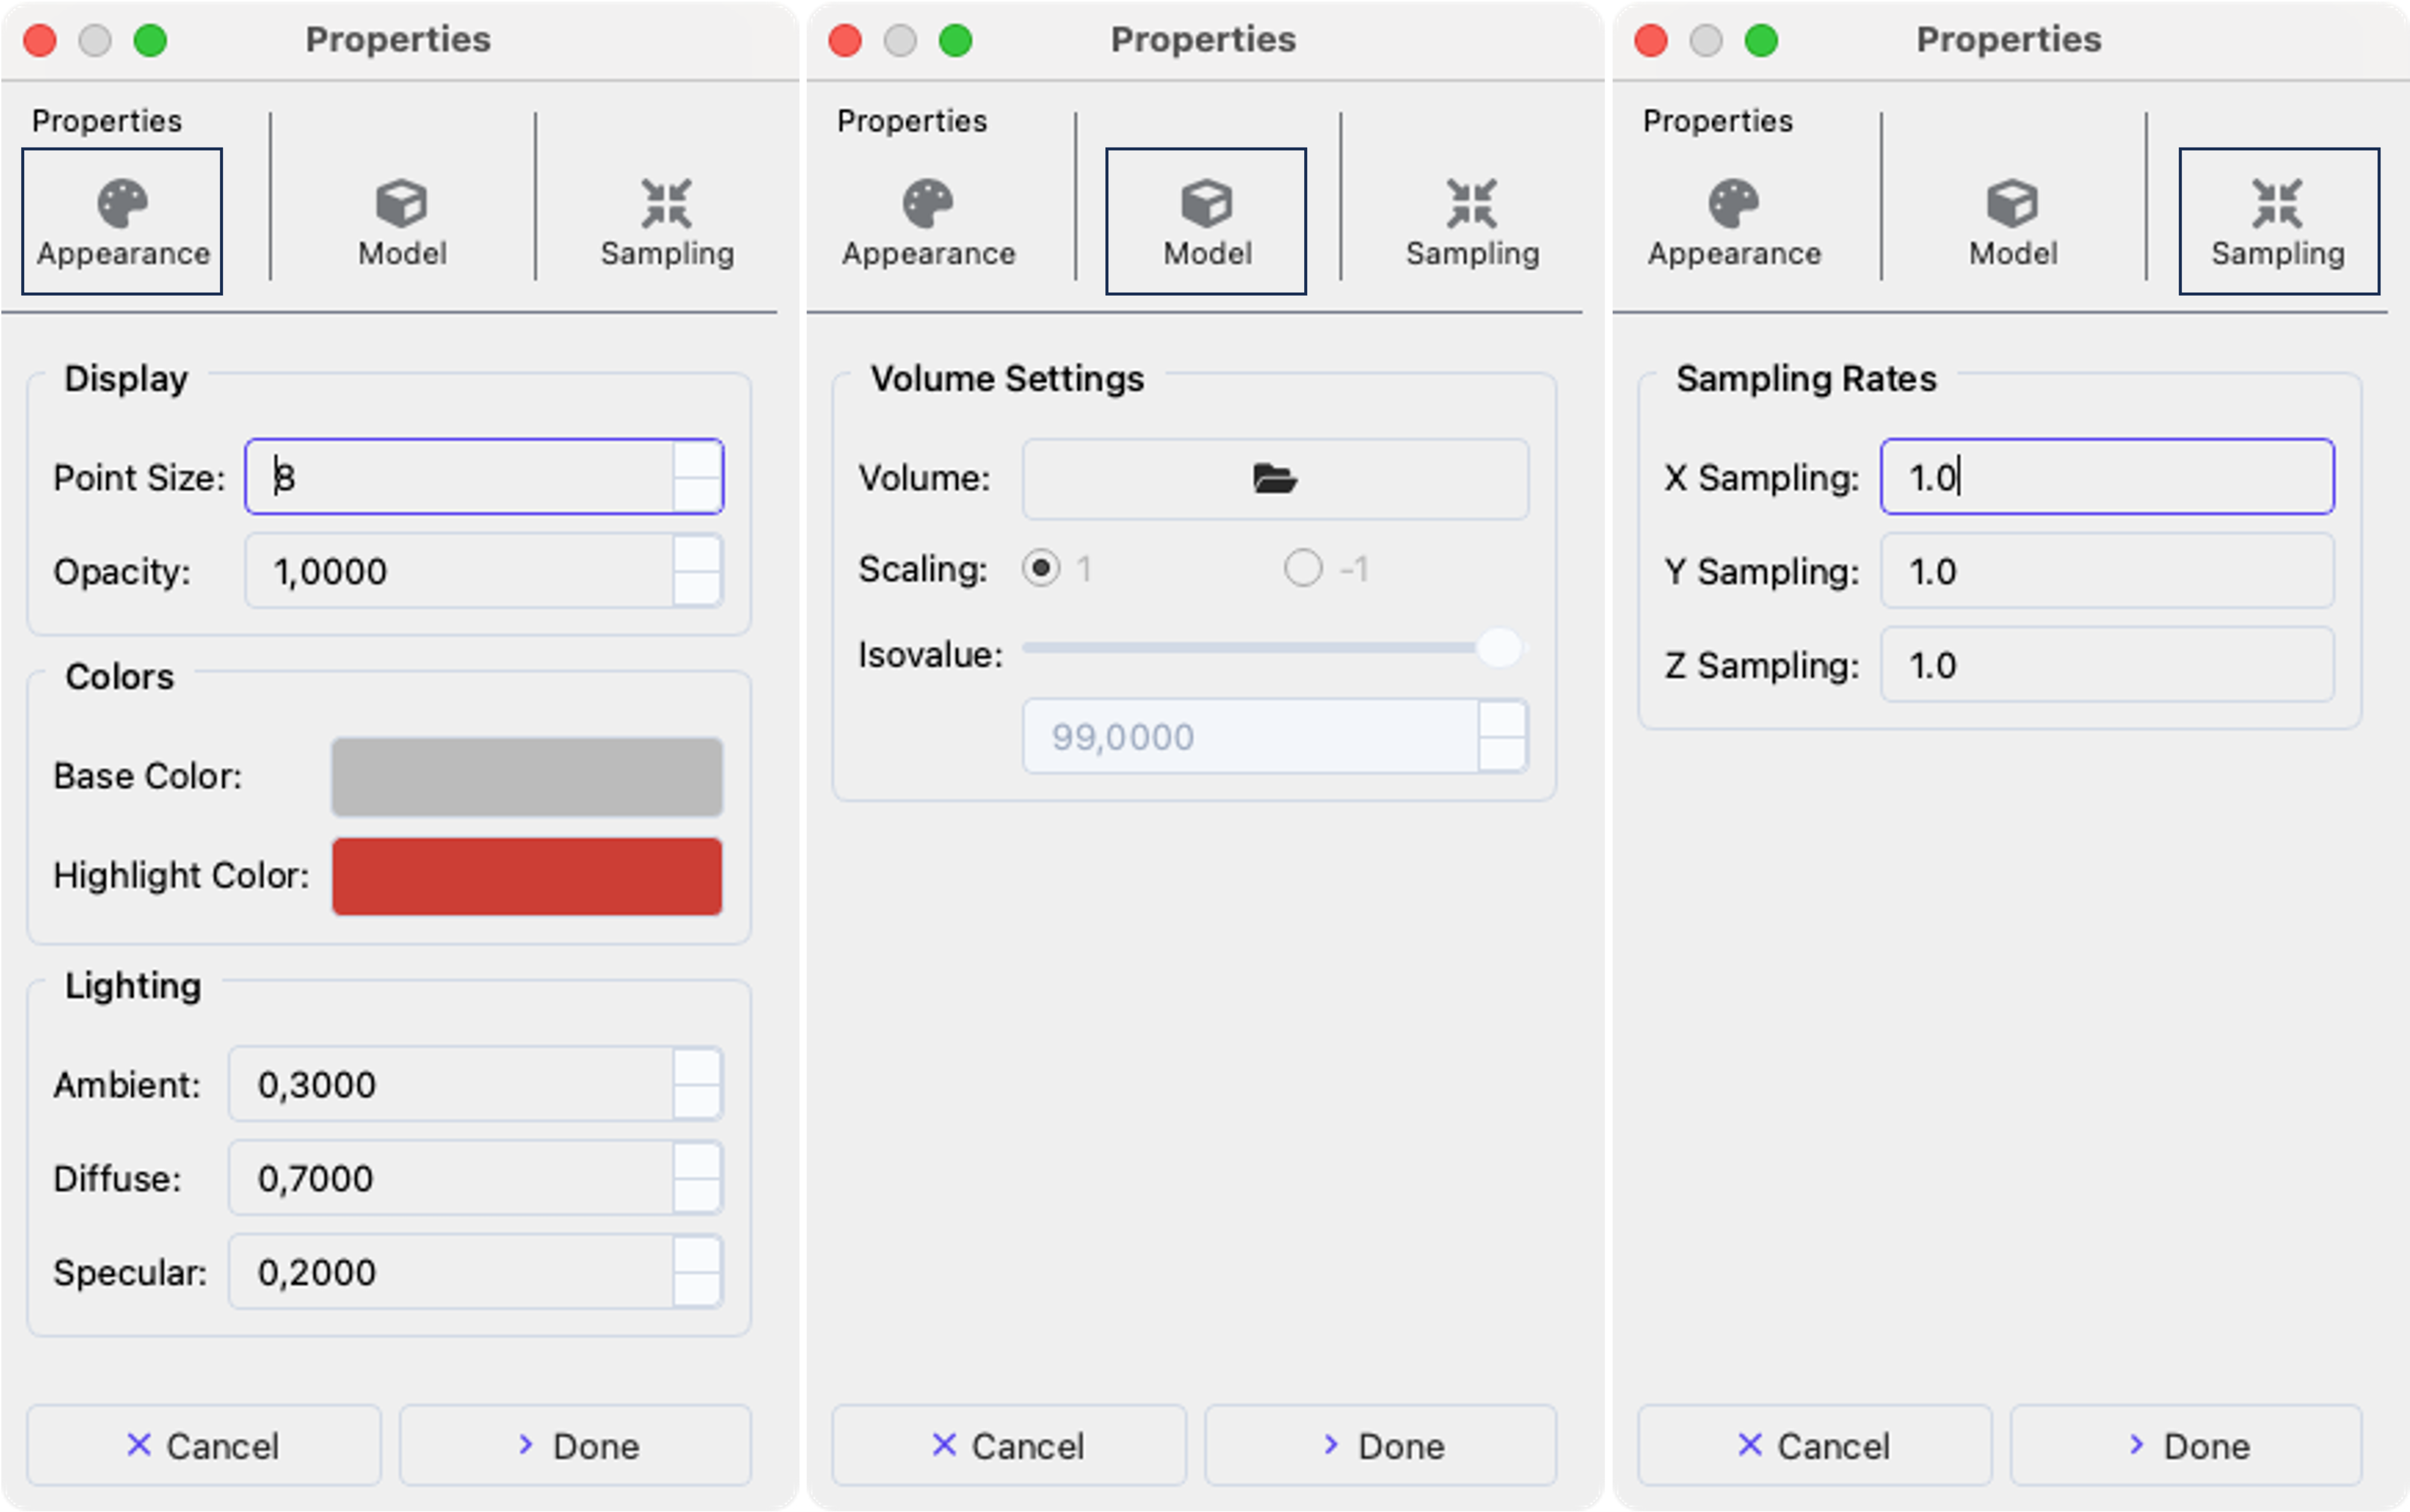
Properties dialog.#
Tip
When selecting multiple objects the same settings will be applied to all of them.
Screenshots#
Mosaic provides several options for capturing the current view:
Static Image: Use File > Save Viewer Screenshot (
Ctrl+P) to save the 3D view as a PNG or JPG file. PNG format preserves transparency.Clipboard Copy: - Viewer only (
Ctrl+Shift+C): Copies just the 3D viewport to clipboard for pasting into other applications - Entire window (Ctrl+Shift+W): Captures the complete Mosaic interface including all panels and controls
Animations#
Mosaic can create dynamic visualizations of your data using File > Export Animation (Ctrl+E). The Animation Settings dialog offers options for visualizing objects in the context of trajectories and volumes (see Specialized Views for more)
Animation Types:
Trajectory: Animate through DTS trajectory time points
Slices: Create a fly-through of volume data by progressing through consecutive slices in the Volume Viewer
Reveal Flythrough: A two-phase animation that first moves through the volume from bottom to top with actors hidden, then reveals all actors in the scene while moving back down from top to bottom. This creates a dramatic effect showing both the volume data and fitted models in context
Export Settings:
Format: Choose from MP4, AVI (video formats), or RGBA (frame series as PNG images)
Quality: Adjust compression quality (higher values mean better quality but larger files)
Frame Settings:
Rate: Set playback speed in frames per second (FPS)
Stride: Control frame skipping (stride of 2 means every other frame)
Window: Specify start and end frames to export only a portion of the animation
Export#
Mosaic distinguishes between three principle export types:
Point Cloud (point data with orientation)
Mesh (triangular mesh fit)
Volume (segmentation volume with integer labels)
Right-click on selected object(s) in the Object Browser and choose Export As
Choose the appropriate category
Point Cloud (point data with orientation)
Mesh (triangular mesh fit)
Volume (segmentation volume with integer labels)
Choose a specific file format based on your selected category
Set parameters specific to the chosen file format
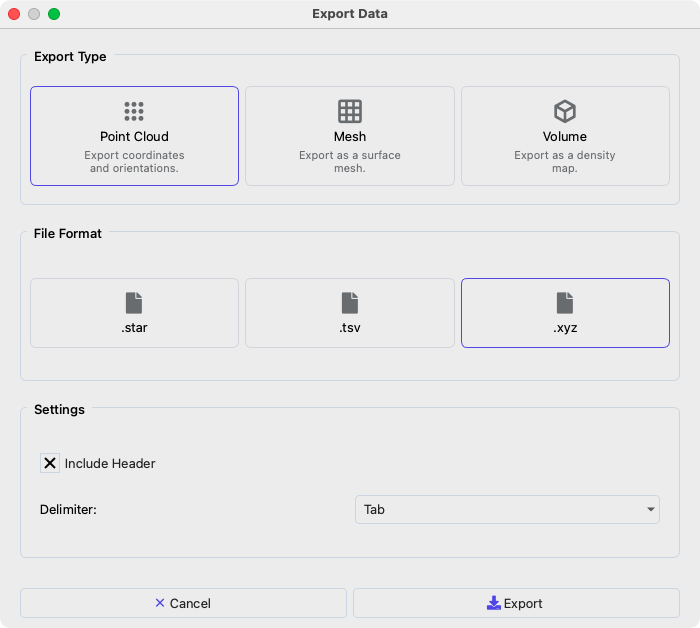
Data export dialog#
The volume category combines objects, others can create separate files. Volume and point cloud categories will scale the objects they operate on based on the associated sampling rate. In case multiple files are selected, they will be named as basename_index.extension.
Programmatic Access for Developers#
Behind the scenes, Mosaic uses the open_file function to import data. This function returns an instance of GeometryDataContainer, which represents a collection of objects present in the loaded file. The container can be subset to individual components using standard Python indexing, returning a GeometryData object. These objects can represent oriented point cloud data as well as triangular meshes.
An example is shown below:
import numpy as np
from mosaic.formats import open_file

# Create example data
data = np.random.rand(50, 3)
np.savetxt(
   "example_points.csv", data, delimiter = ",", header="x,y,z", comments=""
)

container = open_file("example_points.csv") # GeometryDataContainer
cluster = container[0]                      # GeometryData
np.allclose(data, cluster.vertices)         # Returns True
Next Steps#
Continue to Session Management to learn how to create and share Mosaic session files.